Main | Tools
and Materials | Winding the Coils | Cutting
the Rings | List of Weaves
My Armour
Project | My Other Projects | Accessories
| List of Armour Terms
Main | Tools
and Materials | Winding the Coils | Cutting
the Rings | List of Weaves
My Armour
Project | My Other Projects | Accessories
| List of Armour Terms
This is the part you have been waiting for. It is time to start making our maille. << This page is graphically intensive, and may take some time to load.>>
Three methods of making maille are demonstrated below. In each example, the type of maille being made is European 4 in 1.
The Wire Method
The Butterfly Method
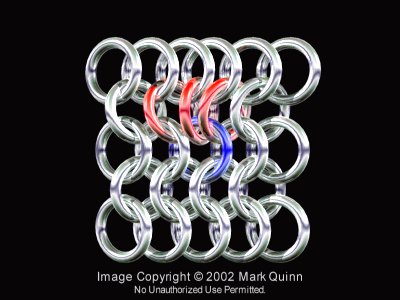
The Olympic Rings Method
Expanding and Contracting the Maille
Tips
This is a simple and efficient method for making European maille (4 in 1, 6 in 1, or 8 in 1). It is the method I use myself, and the one I recommend.
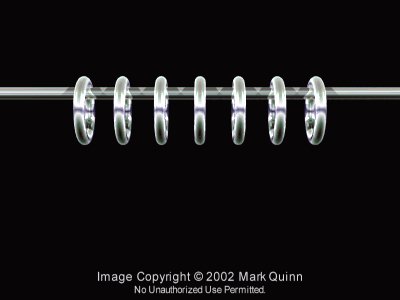
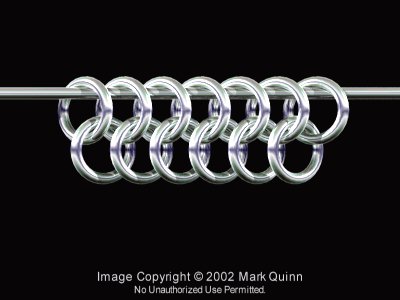
String a number of closed rings together on a wire, thin rod, or string. This will be row 1 of your maille.
The wire is used to hold the rings in place while you work on your maille. The number of rings you use will depend on the width you want your maille to be.
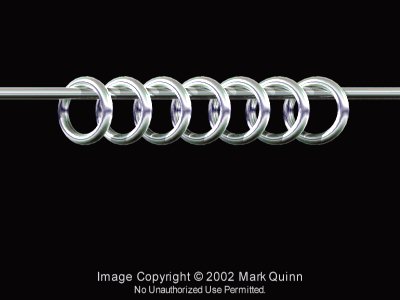
Turn the rings so that each ring overlaps the ring to its immediate right.
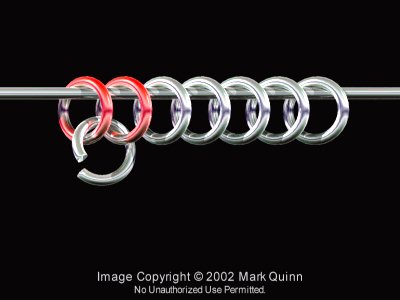
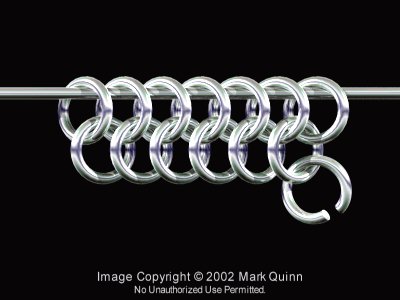
Begin row 2 by connecting a new ring to the two leftmost rings in row 1.
Add another ring, connecting it to the rightmost ring of the pair of rings connected in the last step, and to the ring immediately to its right in row 1. Make certain the ring you just added overlaps the previous ring to its left.
Continue adding rings in this fashion until row 2 is completed.
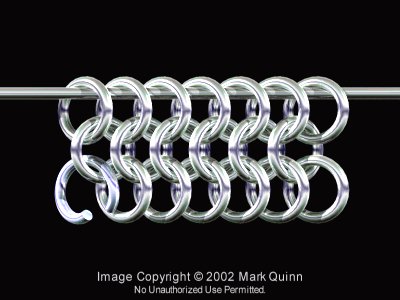
You will notice that row 2 has one less ring in it than row 1 does. To compensate, two additional rings will have to be added to row 3.
Begin row 3 by connecting a ring to the rightmost ring in row 2.
Now add another ring, connected to the two rightmost rings in row 2.
Continue adding rings to row 3 in the same manner you added the rings to row 2, but moving towards the left this time, and making sure each ring in row 3 overlaps the ring to its immediate right.
Complete row 3 by adding an extra ring to the leftmost ring in row 2. This will ensure that row 3 has the same number of rings as row 1.
Once row 3 is complete, you may carefully remove the maille from the wire.
Continue adding rows to your maille, following the same steps you used for row 2 and row 3, until your maille reaches its desired length.
Personally, I find this to be a very slow and awkward method of creating maille, and I do not really recommend it for knitting butted maille. It is a very useful method for constructing riveted maille however.
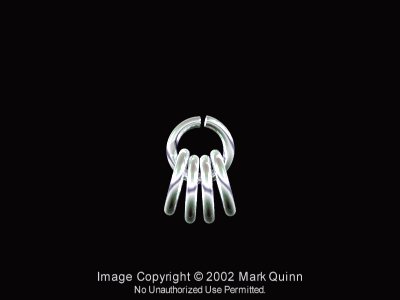
First, close four rings, and connect them together with a fifth ring.
Lay the rings flat, and arrange them with two rings at the top, two rings at the bottom, and one ring in the middle. This will create a single 4 in 1 unit that resembles a butterfly.
To create a larger piece of maille, place two butterflies next to each other, and connect them with a ring.
Continue connecting butterflies together, until your maille reaches the size and shape you want.
The only problem with the wire method is that a wire is required to hold the rings in place while the first three rows are being knit. Unfortunately, one does not always have a spare piece of wire handy, especially if he has just used all of his wire to make rings.

Luckily, the olympic rings method does not require a spare piece of wire, and is not as awkward as the butterfly method.
It should be noted that this method is easiest to do if you construct the maille sideways, then turn it to the correct orientation when the desired length is reached.
Heres how it works:
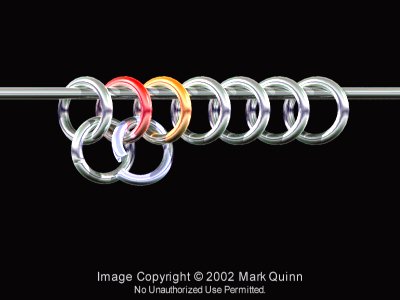
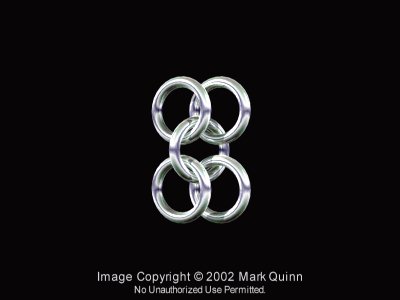
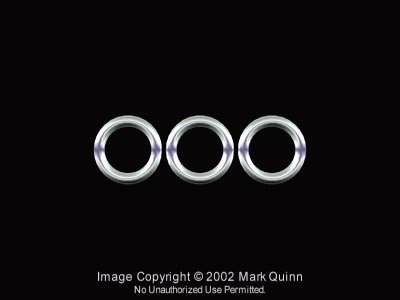
Start with three rings.
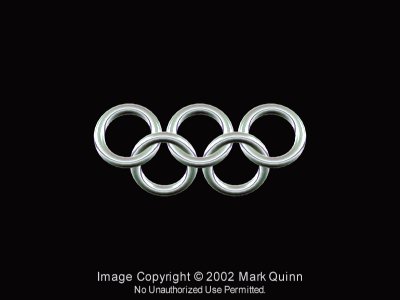
Add two rings to these to form a structure resembling a certain international sports symbol .
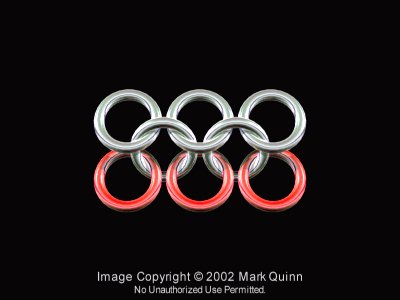
Add three more rings.
Continue adding rings in this manner (2 rings, then 3 rings, then 2 rings, then 3 rings, etc.,...), until you have a strip of maille that is as long as you want your final piece of mailles width to be.
Turn the maille 90º to its proper orientation.
Continue adding rows to the maille using the technique described in the wire method, until your maille reaches its desired length.
It would be great if we were all just tube shaped, but sadly this is not so. Some people have impressive bulging biceps, some people have huge rippling chest muscles, and the rest of us just have large beer guts spilling over our belts.
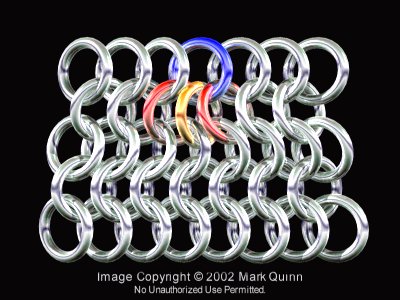
In order to tailor your maille to suit all those lumps and bumps around your person, it is a good idea to learn to expand and contract your maille.
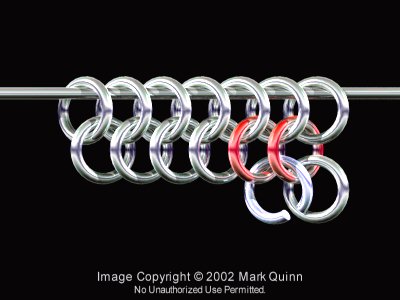
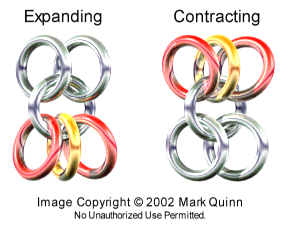
Normally in 4 in 1 maille, each ring is connect to two rings in the row above it, and two rings in the row below it. To expand and contract, we must break this rule, and must connect an extra ring to the row above to contract, or the row below to expand.
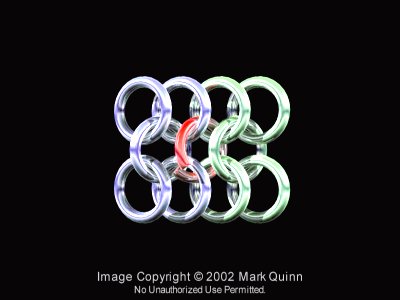
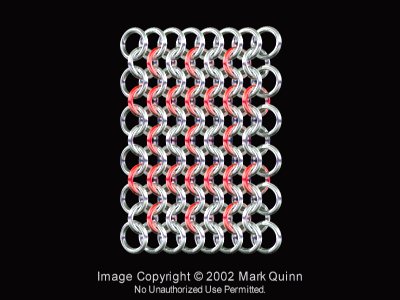
In this example, the blue ring in row 1 has two rings connected to it normally (red), and an extra ring added (yellow). This has expanded the maille from seven rings wide in row 1 to eight rings wide in row 5.
In this example, the blue ring in row 3 has been connected to three rings in row 2, rather than the usual two rings. This has reduced the width of the maille from six rings in row 1 to five rings in row 5.
Never set your pliers down while you are working. If you do, it will slow you down.
Always keep a cache of rings close to where you are working. This is so you can grab rings quickly and easily. I usually work with my maille draped over one knee, and a small pile of rings sitting on my thigh next to the maille. It is a lot quicker, and more convenient than having to reach over to a table for every ring.
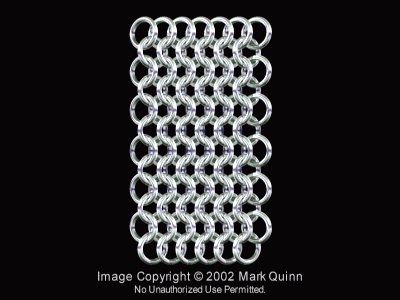
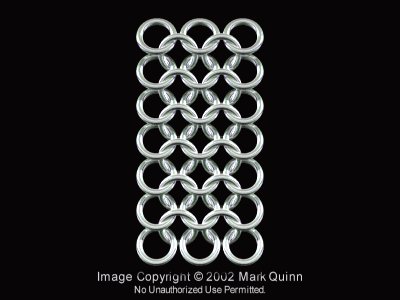
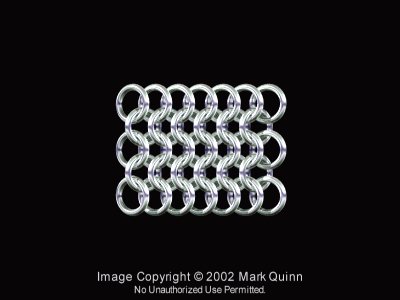
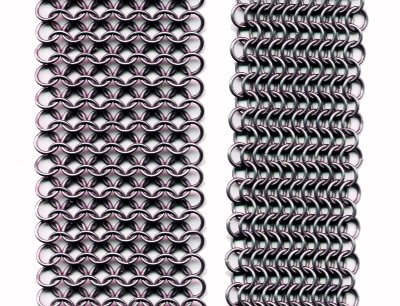
Make sure your maille is in the proper orientation. Maille should be oriented so that all the rows are horizontal, or the maille will not hang properly.
In the above photo, the strip of maille on the left is not properly oriented, and gravity has caused it to spread open under its own weight. The strip of maille on the right is correctly oriented. Under its own weight, it naturally hangs together into a denser pattern.
Start Small. Dont start off with a full suit of armour as your first project. Try something smaller, such as a coif or a belt, to see if you like making maille and improve your skills first.
Make your maille wider than you think it should be. Maille is supposed to be a little baggy, allowing it to hang together more naturally. A good rule of thumb is to make your piece about 1 1/2 times as wide as your measurements.
Try to break your project down into more manageable bits. If you are knitting a sheet of maille that is 100 rings wide, it may take up to half an hour for you to finish a single row, with no noticeable change in the size of your piece. This can be pretty discouraging. If you make five strips of maille that are 20 rings wide, then connect them together, your project will seem to progress more quickly.
Try working on your maille while you are watching television. It will help to break up the tedium.
Always whittle away from yourself. This tip has nothing to do with maille, but it is a good tip anyway.
Never give up. Knitting maille is a long and sometimes tedious process, but youve got to keep working on it if you ever want to complete your project.