
Part I: Creating the Skin FileUsing Wintex 3.4
By Mark Quinn
|
|
|
|
|
|
|
|
This is the most important part. Without S_SKIN the pwad will not work as a skin. Fortunately, it is not all that difficult to do.
The lump itself can be created with any text editor (i.e. notepad). Just remember to follow the format outlined in The DooM Legacy Skin Specs by Dennis Fabrice.
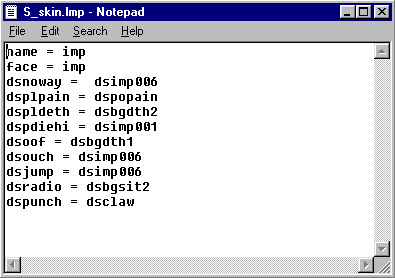
It is highly recommended that you add comments at the beginning your lump relating as much information about your skin as possible. This is in case the readme file you include with your skin is lost.
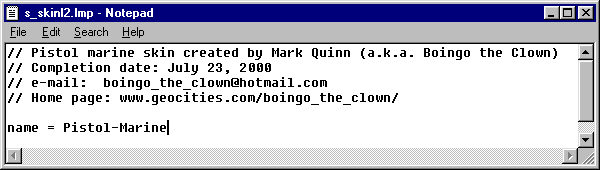
Try to include the following information in your lump if at all possible:
Once you have finished composing your lump, save it as a text file with .lmp as the extension.1.) Your name (or web handle at least).2.) Your e-mail address, or other contact information.
3.) The date your skin was completed. If you have just updated your skin, you should include the date of the update as well. This is so your adoring public will know if they have the most recent version of your skin.
4.) If your skin is a conversion of somebody elses graphics (i.e. one of the aliens from Aliens TC), be sure to give credit to the original author (in the case of an alien from Aliens TC, the credit would belong to Justin Fisher).
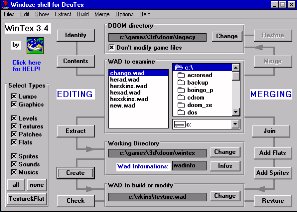
Return to Wintex 3.4.
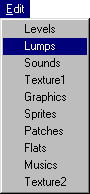 |
To add the S_SKINxx lump to your wad, you need to go the the lumps editing window. Click on Edit in the menu bar of Wintexs main window and choose Lumps. This will open the lumps editing window. |
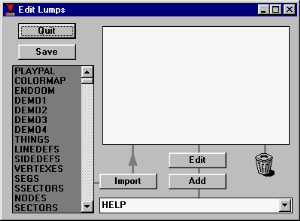 |
At the bottom
of the Edit Lumps window you should find a small input window with HELP
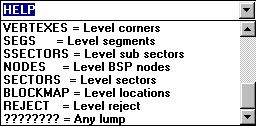
written in it. Pop the window open by pressing the down arrow button ![]() then scroll down to the very bottom of the list. Choose ????????
= Any lump.
then scroll down to the very bottom of the list. Choose ????????
= Any lump.
Type S_SKINxx
over top of the question marks. (xx represents two optional
characters you may add to S_SKIN in order to keep track of which skin the
lump is for. Legacy actually ignors these two characters, so you
can type any two characters you like.) Remember to type over all
of the question marks. Click ![]() then locate and select the .lmp file you made earlier. Click on
then locate and select the .lmp file you made earlier. Click on ![]() to save your changes to wadinfo.txt then click
to save your changes to wadinfo.txt then click ![]() to return to the main window.
to return to the main window.
| Adding Sounds |
|
|
|
|