Main | Tools and Materials | Winding the Coils | Cutting the Rings Knitting the Maille | List of Weaves | My Armour Project | Accessories List of Armour Terms
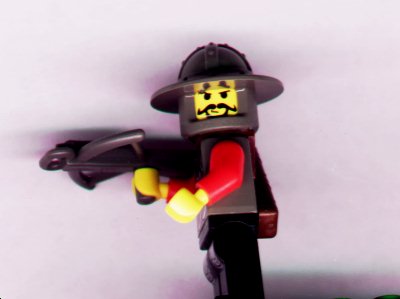
The first of my helmet projects involves the conversion of a Canadian W.W.II infantry helmet into 13th century kettle helmet. This seems like a fairly easy thing to do, as the helmets used by Commonwealth soldiers during the W.W.I and W.W.II were in fact based of the kettle helmet. (For those of you who do not know what a kettle helmet looks like, it just so happens that the little lego knight shown in the photo below is wearing one.)
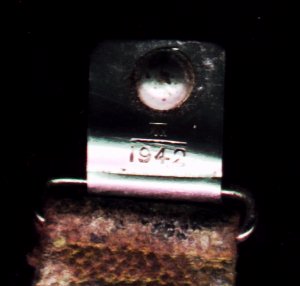
I obtained a helmet from a local army surplus store, and immediately set about removing the chin strap, the suspension harness, and a metal lip around the edge of the brim. I then proceeded to strip the dark brown paint from the helmets surface. The helmet was manufactured in 1942, which was stamped on the metal clasps that held the chin strap in place (See photo). A serial number, 55 1843, was also stamped on the front underside of the brim, but was not visible until the paint was removed.
The plan is fairly simple. The differences between the infantry helmet and a kettle helmet are rather small. To make the infantry helmet appear to be a kettle helmet, all I have to do is widen the brim, then add some metal strips to make the helmet appear to have been made from four sections (spangenhelm construction). First I needed to come up with a pattern for the new brim. Since I did not want to damage the helmet, which is in fact an antique, any more than absolutely necessary, I needed to design the new brim to fit over the old one, rather than replacing it. This meant that the pattern I had to come up with would have to match the old brim exactly. Being the type of person I am, my initial attempt at creating a pattern involved taking measurements from the helmet and working the pattern out mathematically. This pattern didn't work. Boy was I glad I tested the pattern out in bristolboard, rather than metal. I tried two more times, again without success. At this point, I finally got smart, said those two little words that rhyme with bucket, and used the handymans secret weapon (duct tape) stuck on the brim to create the pattern. The thick 14 guage steel I chose for the brim would prove to be far too tough for an ordinary pair of metal working snips to handle. This was a major problem for a considerably long time, until I discovered that there were special metal cutting blades for jigsaws available at the local home centre. I rented a jigsaw, and managed to cut the pieces out in a couple of hours. It looked like smooth sailing from here on in... ...then I hit me a real nasty snag. I thought that I could shape the new brim pieces exclusively by cold hammering them. At first this seemed to work, and I was quickly able to shape the first of the brim pieces to match the shape of the existing brim. The problem arose when it came time to bend a lip up on the inner edge of the piece. The lip was necessary in order to fasten the pice on the the helmet. When I tried to form the lip, the brim piece flattened out. I then tried to restore the form of the brim. This caused the lip to flatten out. After a number of attempts to get the brim piece formed right, it because clear to me that heating the metal would be required. That is where this project stands now. I am hoping to put together a poor mans forge in the next month or so, so that I can get this project back on track. I will keep you informed.
|