Repair On a Maille Mantle

Main | Tools and Materials | Winding the Coils | Cutting the Rings
Knitting the Maille | List of Weaves | My Armour Project | Accessories
List of Armour Terms


This page is currently under construction.
Please be patient while I get it working.

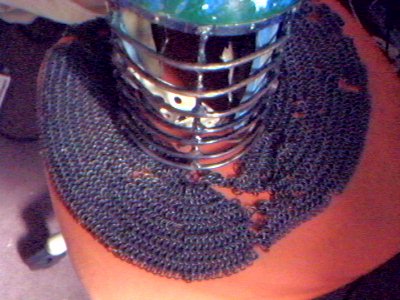
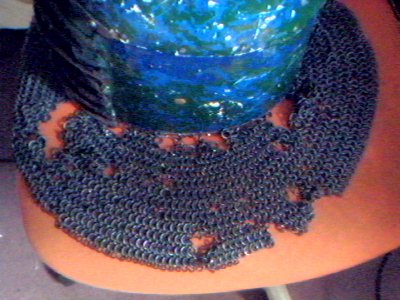
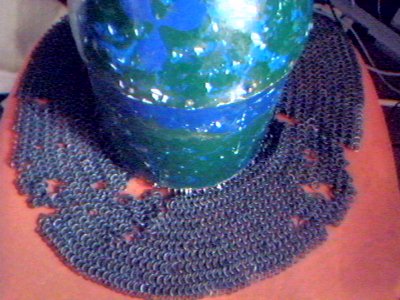
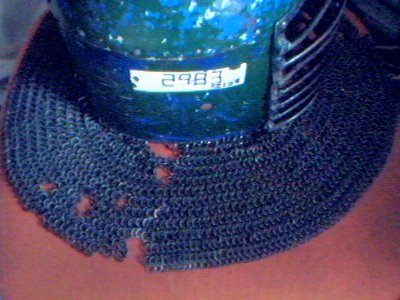
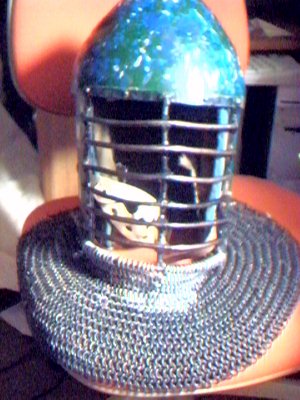
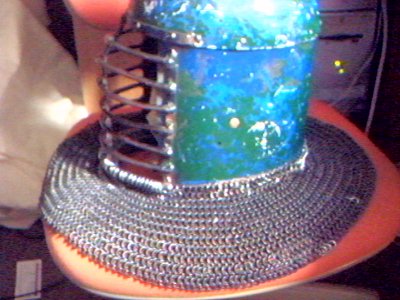
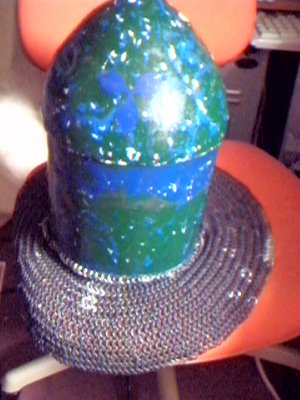
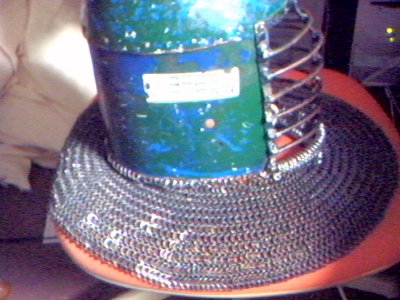
When I first saw the maille mantle of Pete’s helmet, it could be best described as being completely torn to rat shit, and it only got worse from there.

A year later, I just couldn't stand it any more.  I just had to fix it.  As the canton’s most experienced maille armourer, it was only natural.

After a month of pestering him, I finally got Pete to let me have his helmet on June 1, 2003.  At this point, the repair was something of a rush job, because it was Sunday evening, and the canton had already agreed to do a school demo on the following Friday.  I took the helmet home, and started to work at roughly noon the next day.

Here is what I had to work with:

Mantle: Front View

Mantle: Left Side

Mantle: Rear View

Mantle: Right Hand View

The mantle was in terrible shape, with  numerous holes of varying sizes.  The two largest holes were in the front, with only a delicate bridge of rings separating them.  The mantle was no longer attached to the helmet in three or four places, and the most of the vervelles, which were supposed to hold the mantle to the helmet, were gone*.  In fact, the mantle was held on to the helmet with string in several places, and the entire front section, comprising a full third of the mantle was tied to the bottom of the face guard with a length of rope.

*To be honest, they were not really vervelles.  They were rings threaded through holes in the lower edge of the helmet, acting much the same as vervelles.  True vervelles are essentially round staples permanently fastened like rivets.


The first thing I did, of course, was remove all that string and rope. This was done before the photos above were taken.

Then I needed to determine the size of the rings I would need for the repair.  Although not an exact match, I decided that 5/16"  I.D.1 rings the closest match for the rings of the body of the mantle, and that 3/8" I.D. rings provided the best match for the missing vervelles.  All of the new rings were made from 16 SWG2 galvanized steel, and cut using a rotary tool for a clean tight butt.

With the rings cut, I immediately began filling in holes at the back of the mantle3.  The new rings, which were bright and shiny, while to older rings were black.  This created an obvious contrast between the old and new rings.  While this wasn't much of a concern for the small patches I would be making around the mantle, it did prove to be quite a problem when I was working on the front.

Next, I added the vervelles4, and proceeded to reconnect the mantle to the lower edge of the helmet.  The remaining forty 3/8" rings were then fastened around the lowest bar of the face guard to provide new attachment points for the front section of the mantle.

Returning to work on the holes in the matle itself, I decided to change my approach slightly.  I noticed that many of the holes had ragged edges where there a lot of single rings, and strands of rings hanging loosely, and decided that trying to figure out the exact positions was more trouble than it was worth, so I decided to start removing these rings and reattaching them in other areas where they were needed.  It turned out to be a good decision, because it allowed me to close up many of the holes with native black rings, which did not contrast the way the new rings did.


1 Inner Diameter.  This is the diameter of the hole in the centre of the ring.
2 Standard Wire Gauge.
3 It is always a good idea to start in an area where mistakes are less likely to be seen.
4 I know I already said they weren't really vervelles, but I figured it was probably easier to refer to them this way for the purposes of this article.


A little over 48 hours after starting, on June 4, 2003, I was finally done.  The end result was a vast improvement over how the mantle looked before.  The new rings, which were made of bright and shiny galvanized steel, contrasted rather noticeably with the older blackened (probably with gun bluing) rings, but it certainly looked better than all those holes.

Fixed Mantle: Front View

Fixed Mantle: Left View

Fixed Mantle: Rear View

Fixed Mantle: Right Hand View


I presented the helmet the Pete at our weekly arts and sciences meeting on the evening of June 4, and he was very pleased by the repair.  I hope that in the future, he will not wait quite so long before letting me fix it again. ;-)


Main | Tools and Materials | Winding the Coils | Cutting the Rings
Knitting the Maille | List of Weaves | My Armour Project | Accessories
List of Armour Terms