A New Mod For GZDooM and
DooM Legacy
Main | Work In Progress | Notes | Goals and Plans | Screen Shots | Download
A New Mod For GZDooM and
DooM Legacy
Main | Work In Progress | Notes | Goals and Plans | Screen Shots | Download
Skip to:
Introduction
Current progress
May 15, 2007
May 8, 2007
May 1, 2007
February 23, 2007
February 7, 2007
December 24, 2006
July 22, 2006
July 14, 2006
June 22, 2006
I confess. Due to a combination of laziness and nervousness, I've wasted the bulk of the last two months. I have not been entirely idle however, and it led to an exciting advance just yesterday.
The advance has been in regard to the butt stock of the model.
In my last entry, I was preparing to carve the butt, but trying to chop and carve the right shape out of black walnut proved to be much more of a task than I had anticipated. This left me in a quandary. Then I thought of making a duplicator.
A what?!?
A duplicator.
In case you are confused, I will explain.
A duplicator is not a piece of high tech equipment found only on the starship Enterprise. It is just a set-up where a free floating stylus is connected up to a router. The stylus moves over the surface of an original, and as it does, the router follows the same course, allowing it to cut the exact same design in to a piece of wood, plastic, or soft metal. If you still do not understand what I am talking about, here is a video of one being used to duplicate a propellor blade.
I did a little research, and soon discovered a fellow selling plans for one for $20.00 on his web site. However, he was almost immediately S.O.L. in regards to my sending him money, as I quickly figured out his design from the photos on his site in about ten minutes. Then with a piece of scrap plywood, a scrap 2 × 4, a scrap 2 × 6, a piano hinge, and a pair of drawer glides rescued from a university ghetto garbage can, I threw together a crude, but highly functional, duplicator over the span of an afternoon.
Skipping forward two months, seeing how this entry is already way too long as it is, here is what happened ...
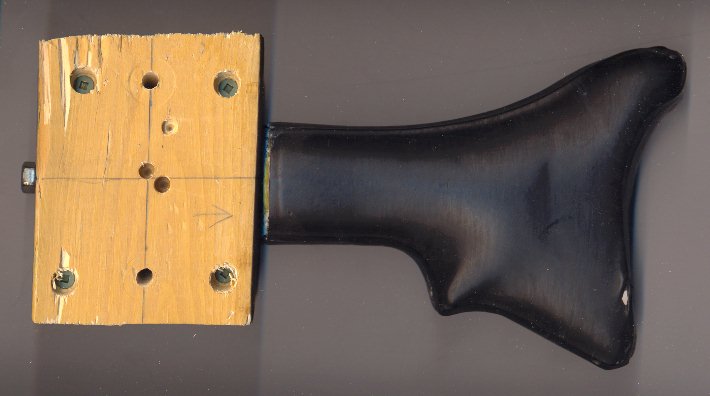
First, I removed the butt from the crappy old Cushman. It was not good enough to be used in my model itself, but by bracing it with pieces of wood to force it into the correct shape, and filling it with plaster to stiffen it up, I figured I could use it as a reasonably good original to copy from.
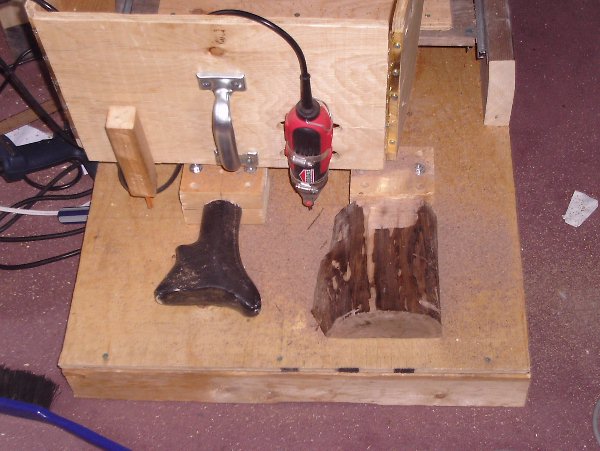
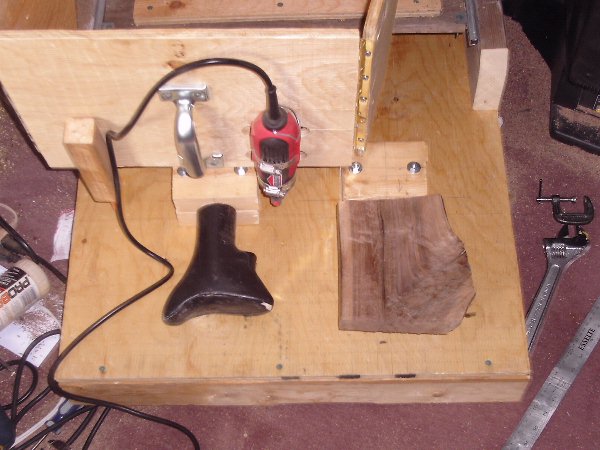
Below is a picture of my crude duplicator. On the left is the Cushman, attached to a block, which in turn is bolted to the table of the duplicator, and on the right is a hunk of tree.
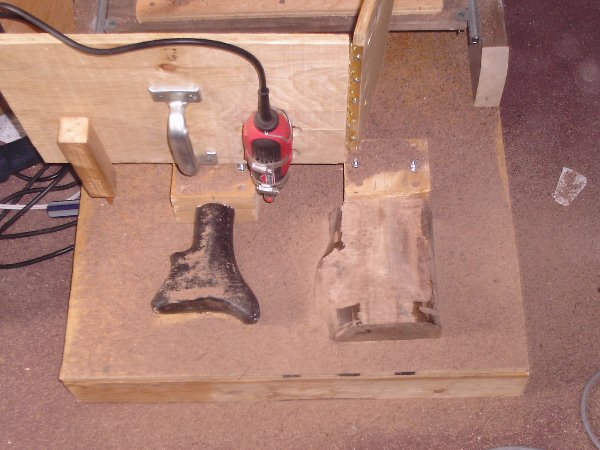
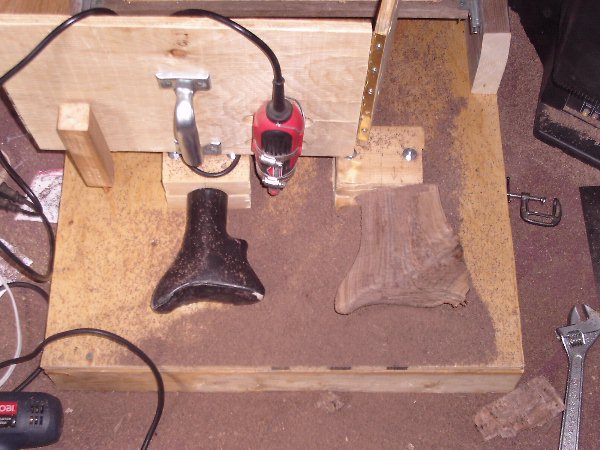
Here the work is progressing. You can start to see the shape of the butt forming in the piece of wood.
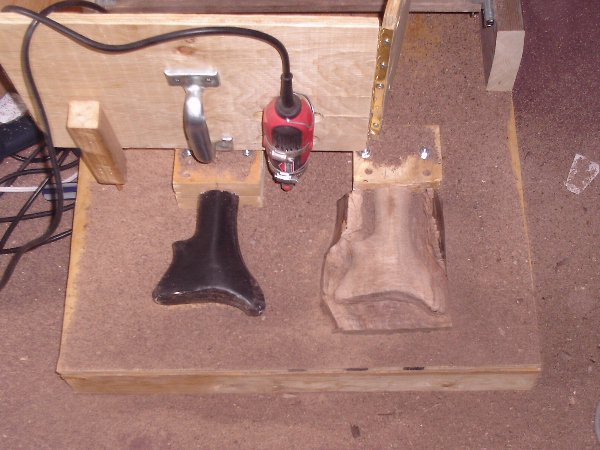
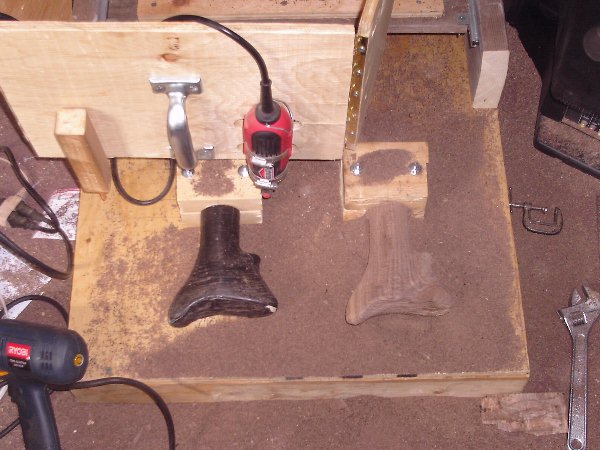
Now a familiar shape has appeared, and my living room carpet is buried under approximately 1 cm of black walnut sawdust. It is time to flip everything over, and vacuum up.
Welcome to the flip side.
It turned out that the wood was misaligned when I flipped it over. Luckily, the misalignment left a 1 mm overhang on the left side of the piece. I did not know the exact size of the overhang at the time, but I knew it meant the right hand side would be short, so I buzzed out the left hand side first, then loosened the anchoring block and nudged it over with a hammer until I got the two halves to match up correctly.
Now you can see why it is called a duplicator.
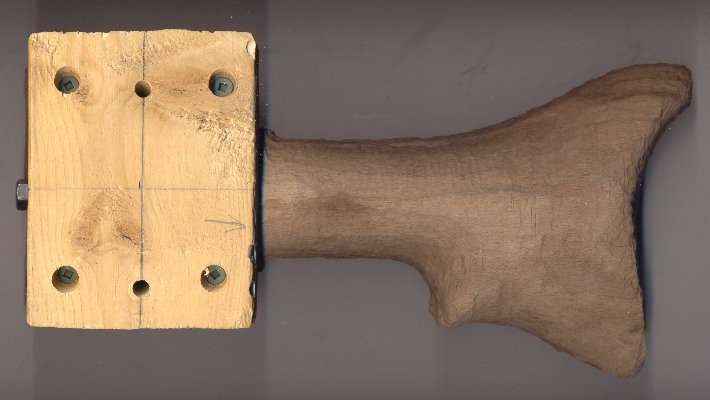
Here is the finished piece.
Finished is in quotes, because there is still a lot of work to do. The butt may look fairly smooth in this scan, but it was actually quite rough, with a network of shallow groves created by the router bit travelling back and forth across its surface.
I whipped out my belt sander, and made short work of all those bumps and grooves, then I hand sanded the living brown stuff out of it. Now it is looking just dandy.
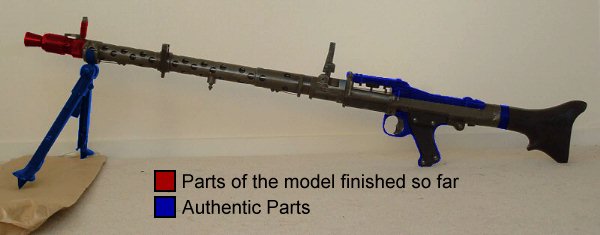
It may not be finished enough for me to colour the butt on my diagram in red yet, but things are certainly heading in the right direction!
Main | Work In Progress | Notes | Goals and Plans | Screen Shots | Download